Guide To Creating AutoResponder Letters
AutoResponders
are powerful tools. Successful online marketers use them to automate repetitive
sales tasks, build and manage multiple prospect lists, and send out regular
articles, updates, and announcements.
More than providing an automated response to an inquiry, AutoResponders can be your own automated sales force working online 24 hours a day, 7 days a week. Used properly, AutoResponders can automate the process of building your lists, following up with your prospects, and helping you close more sales.
Let's look at how someone might use AutoResponders to help build a list of targeted prospects.
The first step is to create 5 to 7 messages about your offer and add them to your AutoResponder Campaign.
These messages can be set to go out every 2 days.. With 7 messages, your prospects would receive your sales messages over a 2 week period.
Here is a simple guideline you can use to create your own follow-up letters:
Message 1: Sent Out Immediately.
In this message you would thank them for requesting your information. Give them a brief history about yourself to build some credibility. They need to know you are qualified to share the information with them. Then give them an overview of the information you are offering.
Be sure to include a link to your web site so they can get further details, place an order, or contact you for more information.
It's also a good idea to include your name and email address. Include a phone number if you want prospects to call you.
Message 2: Sent Out 2 Days Later.
In this message, you may want to give them a brief reminder of what you covered in your first message and focus on the benefits of your offer. What's in it for them? How is your product, service, or opportunity different from others? Use this message to let them know.
And be sure to invite them to your web site, include the link to your site, and include your name and email address so they can contact you.
Message 3: Sent Out 2 Days Later.
This might be a good place to include some testimonials from your company or a little more of your own personal story. If you are new and haven't quite created your own story yet, share success stories and testimonials from others that have used your products or services. Give an overview of how people are using your product or service. If you are promoting an affiliate plan, explain how others are building their income with your plan.
And, as always, be sure to invite them to your web site. Include the URL and include your name and email address so prospects can contact you.
Message 4: Sent Out 2 Days Later.
In this message, pick one feature in particular to focus on. Maybe it's about how your offer can help them save money, be more productive, lose weight, make money, etc...
Remind them that you are available to answer questions and provide support.
And, as always, be sure to invite them to your web site. Include the URL and include your name and email address so prospects can contact you.
Message 5: Sent Out 2 Days Later.
Use this message to be a little more personal. Let your prospects know that you are available to help them in any way you can. This message could be used to simply thank them again for requesting your information and assuring them that you are a real human being and interested in helping them succeed.
And, as always, be sure to invite them to your web site. Include the URL and include your name and email address so prospects can contact you.
Message 6: Sent Out 2 Days Later.
Use this message to stress another set of features from your offer. Share a few more testimonials from others or from your own experiences with your product, service, or opportunity.
Briefly review some of the details you have shared from previous letters.
And, as always, be sure to invite them to your web site. Include the URL and include your name and email address so prospects can contact you.
Message 7: Sent Out 2 Days Later.
This message can be used to ask for some feedback from your prospects. Tell them you have enjoyed sending the information and you hope it was helpful to them. Ask them if they have any concerns or what might be preventing them from making the decision to purchase from you or join with you.
Sometimes, you will get some good feedback from folks. They may share some concerns they have or tell you why they feel your offer may not be for them at this time.
Thank them for agreeing to receive your information and let them know you are still available to answer any questions they may have.
And, as always, be sure to invite them to your web site. Include the URL and include your name and email address so prospects can contact you.
Now That Your Letters Are Created And Ready To Go:
Once the letters are loaded in to your AutoResponder Campaign, your next step is to begin getting prospects for your AutoResponder to follow up with.
The idea here is to begin advertising to attract prospects to your offer. Give people a compelling reason to request your information. This is where you want to start thinking like your prospects. You are asking them for at least a name and email address. What are you giving them in return?
Maybe your information shows them how to start and profit from their own home based business. Maybe you are offering tips on how to better protect their identity. Maybe you are offering weight loss tips or nutritional information. Maybe you are offering information on how to promote a web site.
Since I sell AutoResponders, I offer prospects free information to show them how AutoResponders can help boost their online sales.
I have added a subscription form to my web sites.
I use lead capture pages.
I include my email subscription address in my ads.
I include my email subscription address and/or my URL in discussion forum posts.
Then I focus all of my advertising on my lead capture pages so that people will request more information from me. I don't try to sell them up front. I want to capture their information first. THEN I will focus on following up to close the sale.
As people request your information by filling out your subscription forms or emailing your AutoResponder, their information is captured in your database.
Now your AutoResponder goes to work sending out your sales message.
For the next two weeks, your prospects will be receiving your sales letters. You don't have to remember to send them out. You don't have to remember which prospect has received which letter. Your AutoResponder is working for you behind the scenes.
Now your focus should be on two things:
1.
Continuing to advertise to get more prospects in to your
AutoResponder
2.
Using the feedback you get from prospects to adjust your letters.
You may need to make a few
changes. Maybe you see a recurring question from prospects. That recurring
question is letting you know that you may need to cover that information a
little better or more in depth.
This is just a simple guideline you can use to create your own follow-up messages for your AutoResponder. You may use more letters or less. The average for successful marketers seems to be in the 5 to 9 range.
Notice that each letter ended with a "call to action" where you invite the prospect to your web site or to contact you for more information.
This "call to action" is a critical element to the success of your messages. You must let prospects know what to do next and how to do it.
Yours in success,
Amin Fafizullah Bin Omar
TrafficWave.net LLC
TrafficWave.net LLC
P.S. You can review this and all of our other Training Articles
online by logging in to your back office at http://www.trafficwave.net/members/reviews and clicking "Training Articles".
P.P.S. Was this training article helpful? Let us know how we can
improve. We welcome your feedback and comments.

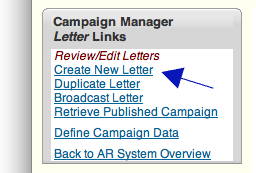 Click "Create New Letter" on the left of your screen.


