Setting Up Your AutoResponder with TrafficWave Letters
Hello my friends,
This
article is designed to show you how to have your AutoResponder set up to
promote your TrafficWave.net Affiliate URL. If you are using our tools to build
your primary business, you will find those setup instructions in your back
office. If you are subscribed to our Tools Training Messages then you have
already begun receiving those instructions.
This
particular setup is specifically directed at helping you get your AutoResponder
set up to promote TrafficWave.net. Hopefully, you've taken the steps I've given
you in the previous emails. You should be replying to emails and contacting
your close friends and associates with information about TrafficWave.net and
inviting them to your Affiliate URL.
Now
it's time to dig in and start setting up your tools so that we can add other
"funnels" to begin bring in even more new prospects for you.
The
first step is to set up your AutoResponder with our pre-written TrafficWave.net
letters. These letters have all been written to show prospects how
AutoResponders can help them boost their sales and automatically include links
to your Affiliate site. So let's get started:
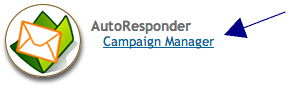
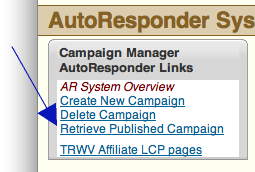
1.
Place your mouse over "AutoResponder" in the top grey
toolbar.
4.
Type in your "New Campaign Nickname". I recommend
calling this one "trwv"
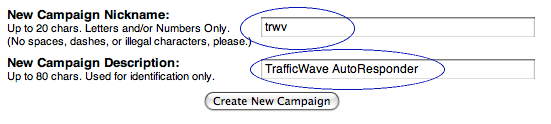
6.
Click "Create New Campaign" to create the new
AutoResponder campaign.
(In the screen that pops up, click "Confirm" to save your settings.)
(In the screen that pops up, click "Confirm" to save your settings.)
Your
new AutoResponder Campaign Has been Started. Now we will retrieve the
pre-written TrafficWave.net letters in to this new "trwv"
AutoResponder:
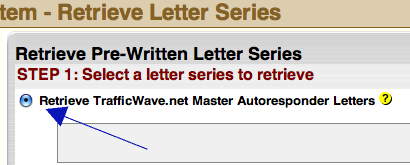

5.
Click the "Retrieve Pre-Written AutoResponder Letters"
button.
6.
Confirm by clicking "OK" in the window that pops up.
Your
new TrafficWave.net AutoResponder has been created. You now have our
pre-written letters installed in your new "trwv" AutoResponder. Take
a little time to review the letters so that you can be familiar with what you
will be sending your prospects.
Linking your new trwv AutoResponder to your Affiliate Pages:
Now
that you have created an AutoResponder, we need to make sure we can get
subscribers in to it. We'll start by linking your Affiliate Pages to this new
AutoResponder.
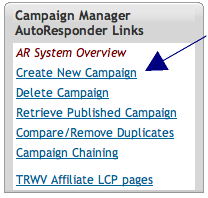
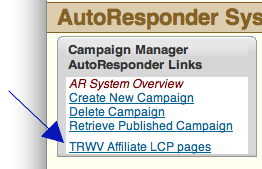
2.
Click "TRWV Affiliate LCP Pages" on the left of your
screen:
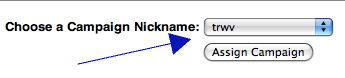
4.
Click "Assign Campaign"
Now,
any time someone visits your TrafficWave.net Affiliate site and fills out any
of the subscription forms, they will be subscribing to your "trwv"
AutoResponder.
If
you are not familiar with your Affiliate URL's just go to the "Home"
section of your Back Office and look under "Affiliate Status".
Yours
in success,
Aminbeb
P.S.
You can review this and all of our other Training Articles online by logging in
to your back office at http://www.trafficwave.net/members/reviews
and clicking
"Training Articles".
P.P.S.
Was this training article helpful? Let us know how we can improve. We welcome
your feedback and comments.
