Setting Up Your AutoResponder
Hello, My Friends
This Training Article is designed to help you get started with setting up your AutoResponder. We are going to cover four distinct steps in today's article:
- Creating An AutoResponder Campaign
- Creating Your Custom Confirmation Message.
- Creating Your First AutoResponder Message.
- Personalizing Your AutoResponder Messages.
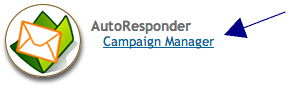
Creating an AutoResponder Campaign:
- Click "Campaign Manager" in the AutoResponder section:
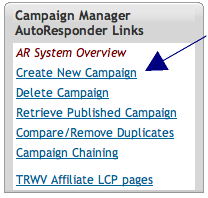
- Click "Create New Campaign" on the left of your screen.
- Type in your "New Campaign Nickname". This will be the name of your new AutoResponder campaign.
- Enter a description for your new campaign. This will help you quickly identify this campaign in the future.
- Click "Create New Campaign" to create the new AutoResponder campaign.
(In the screen that pops up, click "Confirm" to save your settings.)
In the new screen that comes up, you can change your "Return Email" name, your "Return Email Address", and your "Campaign Title" by clicking Update Campaign Profile Information . This information can be changed any time you like and as often as you like.
Your new AutoResponder Campaign Has been Started.
Creating A Custom Confirmation Message:
Your new AutoResponder campaign already has a generic confirmation message that is sent any time someone is subscribed to your AutoResponder. Creating your own custom confirmation message can dramatically increase your confirmation rate.
To create your custom confirmation message:
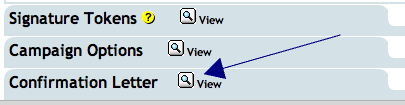
- Scroll down the screen and click "View" next to "Confirmation Letter".
- Click Edit Conf. Letter
- Enter your custom confirmation message in to the "Message Body" form.
- Check the box to indicate that you have read and agree to the policy:
- Click "Submit Campaign Confirmation Message".
Your new custom confirmation message will appear in the next screen.
DO NOT add any outside links or email addresses to this message.
The sole purpose of this message is to have prospects confirm or deny their interest in receiving your information. By adding outside links or email addresses, you will be opening yourself up to spam complaints which, as per our policies, will cause your account to be terminated.
|
Creating Your Followup Messages:
TrafficWave.net has a powerful WYSIWYG (What You See Is What You Get) Editor to help you create anything from a simple text-type message to a full-blown web site complete with graphics, tables, and formatting to suit your tastes and objectives.
(NOTE: In order to prevent being logged out of the system and losing your changes, be sure to save your letters every few minutes.)
- Click the grey "Letters" tab.

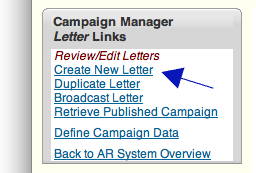 Click "Create New Letter" on the left of your screen.
We recommend clicking the WYSIWYG Editor Tips button on the left of your screen to become familiar with the powerful features and options available to you.
- We'll use the WYSIWYG (What You See Is What You Get) Editor to create your new letter. You can type your information in to the Subject Line field and the WYSIWYG Letter Body Editor field.
Note About Copy and Paste: If you want to copy and paste text from a text editor such as "Notepad" or "BBEdit" be sure to use the "Paste as Plain Text" icon. This will help preserve any formatting from your text editor.
If you are copying and pasting from a word processor such as Microsoft Word, use the "Paste from Microsoft Word" icon. This will help preserve any formatting that is typically found in programs like Microsoft Word and other similar word processing programs.
Be sure to use the proofread message button to view and confirm that the formatting is as you intended. - After you have created your first letter, click "Save This Letter" at the top or bottom of your screen. Don't worry if the letter isn't perfect or formatted just the way you want it right now. You can always go back and edit any of your letters at any time.
- Scheduling Your Letters To Be Delivered.
When you first save your letter, it is found in the Stored (Held) Letters section. Stored letters are NOT sent out automatically.
In order for your letters to begin going out automatically, you will need to enter a number in the "# Days Delay" box.
If you want your letter to go out immediately after your subscriber confirms their request, enter a zero ( 0 ).
If you want the letter to go out 1 day later, enter a 1.
If you want the letter to go out 2 days later, enter a 2.
If you wanted your letters to go out once a week, you would set up your # Days Delay like this:
Letter 1: 0 Days Delay (goes out instantly)
Letter 2: 7 Days Delay (goes out 1 week later)
Letter 3: 14 Days Delay (goes out 2 weeks later)
and so on ... - Repeat steps 2 through 5 above to create your next letters. Your AutoResponder campaign will support an unlimited number of letters. You can change any letter any time you like. To change the order of your letters, just change the number in the "# Days Delay" field and click "Submit Delay Changes".
Personalizing Your Messages:
Which subject line would be more likely to attract your attention as you sort through emails?:
"Here is your new link to savings"
or
"Amin, here is your link to savings"
Clearly, the subject line that has your name is more appealing. You can personalize your subject lines and your messages with our powerful personalization options.
To personalize your subject lines:
- Place your mouse cursor in the Subject Line field where ever you want your subscriber's name to appear.
- Select either "Name", "First Name", or "First Name" and "Last Name" in the "Add Token" section below your Subject Line. (Be sure you are using the appropriate token. If you are collecting the full name of your subscribers as one field, you will need to select "Name". If you are collecting the first and last name separately, you can use "First Name" by itself for the first name or "First Name" and "Last Name" to insert their full name.)

- Click the "Add" button.
The selected Token should appear where you placed your mouse cursor.
To personalize your message body:
- Place your mouse cursor where you would like the subscriber's information to appear.
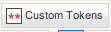
- Click the "Custom Tokens" icon:
- In the window that comes up, select the information you would like inserted in to the message body.
- Click "OK".

Congratulations! You have just created your first autoresponder, set up your first letter, and personalized your message with your subscriber's name!
Not a bad start!
Tomorrow's article will cover information on how to set up capture forms for use in our own hosted lead capture pages and adding capture forms to your own web site (if you have one).
Yours in success,
Amin Fafizullah Bin Omar
TrafficWave.net LLC
TrafficWave.net LLC
P.S. You can review this and all of our other Training Articles online by logging in to your back office at http://www.trafficwave.net/members/reviews and clicking "Training Articles".
P.P.S. Was this training article helpful? Let us know how we can improve. We welcome your feedback and comments.
No comments:
Post a Comment